12.14.2015

DIY Minecraft Party Ideas

DIY Minecraft Party Ideas - LeroyLime

My oldest son turned 8 last month and thank goodness he picked an easy party theme...seriously, if you have a square punch, you can put together a Minecraft Party, no problem!

DIY Minecraft Party Ideas - LeroyLime


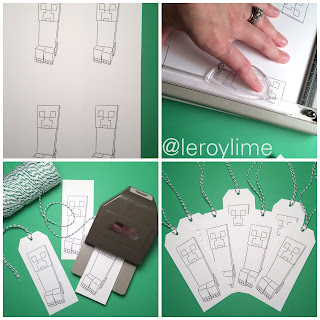
For his school classroom party favors, I had to come up with something that didn't involve sweets or treats, so found a very simple creeper online that I printed out and turned into bookmarks that the kids could color. Glow Sticks are always fun and you can snag them very inexpensively at your nearest Dollar Store. I added a wearable paper mustache, just for fun, that I cut out using a Sizzix Die and my Big Shot.

DIY Minecraft Party Ideas - LeroyLime

Then onto the decorations for his actual Birthday and Birthday Party...
A fun banner, using brown and green. The green tops of the triangle pennants were dry embossed with a grass embossing folder and a Texture Boutique Machine, specifically for dry embossing.
The Creepers were made just like the invitations, using green cardstock and black squares.

DIY Minecraft Party Ideas - LeroyLime


A roll of green wrapping paper turned his packages into a fun little Creeper, which he posed with in the morning...I used a larger square punch and my paper cutter to make larger square pieces for the face. Some green and black balloons and streamers added a bit more pizzaz to his Creeper.


A package of green paper lunch bags and a square punch turned these into fun Creeper Party Bags...but what do you put in them, don't worry, we've got ya covered!


One square punch can make all the pieces you need, you don't need to buy multiple square punches. Just flip your punch over so you can see the cardstock, punch out the pieces needed and adhere to your party bags!


We filled the party bags with TNT (individually wrapped red licorice) and mini gold wrapped Twix bars for Gold Ingots. Added a bookmark and glow stick bracelet but the bags seemed a bit empty...so...out to the garage, where I cut scraps of wood into 4X4 squares. 


A quick sandjob by the almost 8 year old and then I put him to work painting them all green. 


 I made a paper template (which I used twice) using a smaller square punch and removeable adhesive, before tossing that in the trash and free hand painting the rest of the faces on the blocks.


I'd love to see your Minecraft Party posts too, feel free to link them in the comment section below! Happy Creeping...


12.13.2015

Ad Space Giveaway with Angie

12 Days of Giveaways Day 11 | Gigantic Ad Space Giveaway 

 Are you a blogger or a shop looking to grow your following and bring more eyes to your site or product? Well, then day 11 of the 12 Days of Giveaways is just the thing for you. Angie who blogs over at My So Called Chaos and other fantastic blogs have come together to bring you some fabulous opportunities to get your name out there. There will be three winners, and there are three different ad space prize packs.

Advertising Prize Pack #1

Total value of Prize Pack 1: $275

Advertising Prize Pack #2

Total value of Prize Pack 2: $163

Advertising Prize Pack #3

Total value of Prize Pack #3: $102

Enter the Giveaway

This giveaway is open worldwide and will end at 12AM on 12/28/15. Entering below agrees to all terms and conditions within the Rafflecopter.

12.07.2015

Olaf Disney Countdown

Look how fun....Summer!!!

Olaf Disney Countdown - Freehand Chalkboard Lettering and Art - LeroyLime

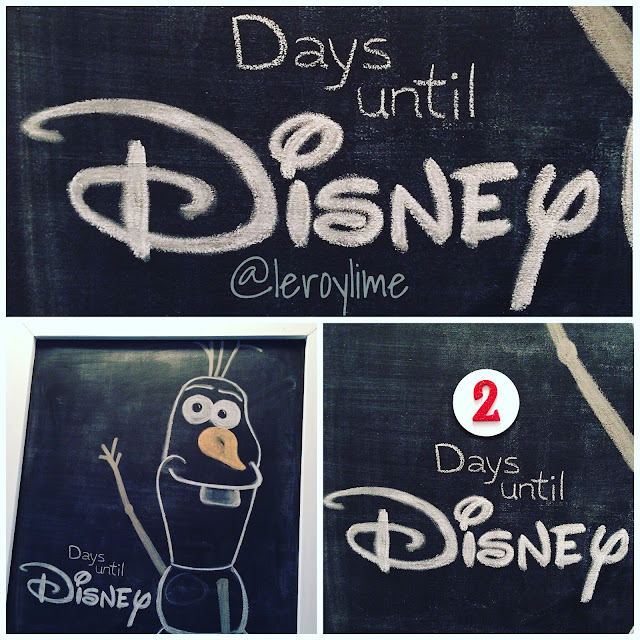
A quick wipedown and free hand drawing on the magnetic chalkboard
and we have a happy little snowman helping us countdown to Disney!
Olaf is a favorite in our house and our two year old calls him "Summer"...
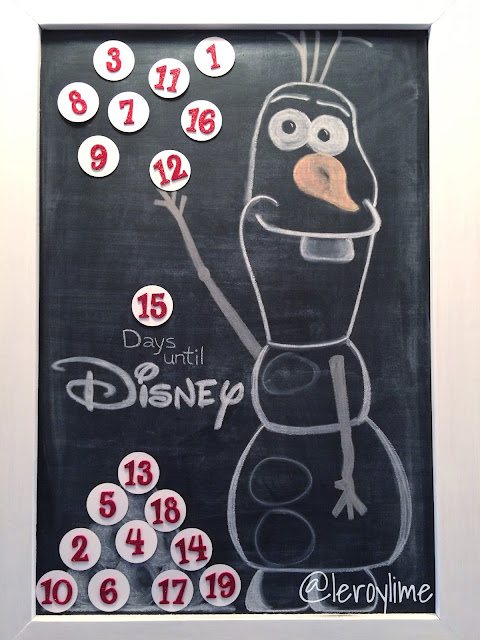
With my Ipad in one hand for visual purposes, I free handed Olaf and lettering with regular chalk. I find that keeping your chalk sharpened helps with more precise lines. You can just use a regular pencil sharpener. I keep one in my chalk box so it doesn't grow legs and run off.  No orange chalk for his nose, so I just layered red and yellow till it looked a bit on the orange side. Grey was also used for his arms and hair since brown chalk wasn't in my box. Another helpful trick when you are drawing or lettering on your chalkboard. Rub your finger over your lines to soften them up a bit. This also helps with shading, since you can pull the chalk with your finger.

Olaf Disney Countdown - Freehand Chalkboard Lettering and Art - LeroyLime

Next I took my 2-1/2" Circle Punch and cut out some white circles for snowballs. Made some sparkly red numbers with my Sizzix dies and Big Shot and then attached a small piece of magnet strip to the backs to make them magnetic and easily moveable on the board.

Olaf Disney Countdown - Freehand Chalkboard Lettering and Art - LeroyLime

My hubs said he was more impressed with my Disney lettering than Olaf...haha!
I apologize for the lighting, the chalkboard is directly across from our pantry in a hallway and doesn't get natural light.

I hope you enjoyed and are inspired to give freehand chalk drawing and lettering a try, it really is much easier than you think!

Olaf Disney Countdown - Freehand Chalkboard Lettering and Art - LeroyLime


11.30.2015

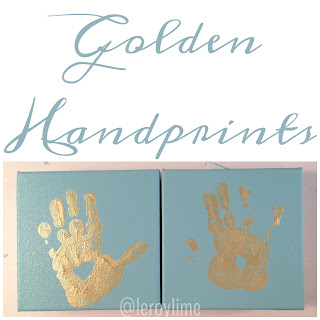
Golden Handprints


Golden Handprints - Kid Craft - LeroyLime


Better late than never is the motto in our busy house with four kiddos running around. I've had these canvases for over a year now so instead of one year old hand prints, we now have two year old hand prints. Which may be easier to accomplish since you can explain to a two year old how to hold out their hands.

Golden Handprints - Kid Craft - LeroyLime

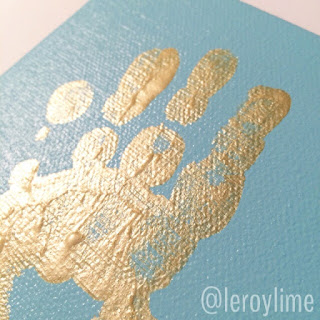
I started off putting tacks under the back side of the canvases, this way, you can paint the sides without sticking to the surface underneath. A paper plate for easy clean up and it makes a great spot to squeeze your paint. I painted two coats of Martha Stewart Surf in Satin onto the canvases with a foam brush. Then waited a day before pulling out the gold.

Golden Handprints - Kid Craft - LeroyLime

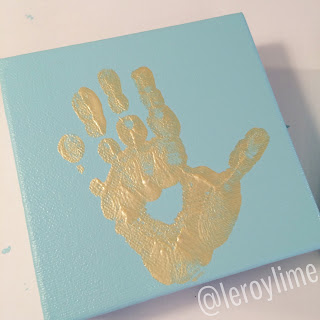
I started by letting my two year old rub her hand around in the gold (Martha Stewart Metallic Green Gold) paint and then flipped it over to paint the missing spots and take off the excess paint, so it wouldn't smear, with a clean foam brush.

 Golden Handprints - Kid Craft - LeroyLime

Talking her through the steps and showing her with my hand what she needed to do, I helped push down on the back of her hand gently and then helped her pull it off of the canvas. We washed in between hand prints to keep the mess at bay. I think they turned out great and I'm glad we did both of them so we can remember her sweet little handprints for years to come! 

Golden Handprints - Kid Craft - LeroyLime

The gold was a fun touch and would make great gifts for family members with the holidays coming up. If you need to make more than one, trim up a piece of watercolor paper and you've got the perfect gift for Grandparents!

Golden Handprints - Kid Craft - LeroyLime


11.23.2015

DIY Cozy Neutral Wreath

Cozy Neutral Chenille Wreath - LeroyLime

When the cold weather kicks in, there is nothing like a cozy sweater to warm you up. I decided to try my hand at my second wrapped wreath (you can find the first one here) but this time I used chenille instead of plain yarn. It was fantastically soft to work with and I have quite a bit left over from my roll to use for other projects.

Cozy Neutral Chenille Wreath - LeroyLime

Start by tying your yarn around your foam wreath form and knotting in place, then go to town with your lasso skills and make sure you have a cup of coffee (or wine) handy, it does take a bit of time and patience. I wrapped both of my wreath forms sitting in our driveway while my kiddos played with their toys. As you can see, Satine, our Yorkie, was a big help! Once you've worked your way around your wreath form, knot your yarn in the back and move on to your smaller wreath form and do it again. Practice makes perfect!

Cozy Neutral Chenille Wreath - LeroyLime

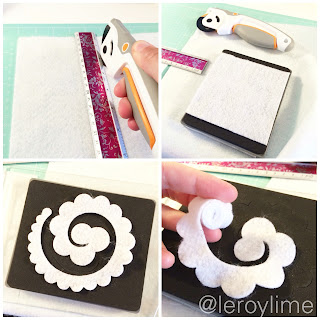
I wasn't sure how many flowers I'd want on the wreath so instead of picking up individual felt sheets, I grabbed a pack of felt, a much larger piece that I cut down with my pizza cutter and mat. I have a handy flower die that cut the felt perfectly after I ran it through my Big Shot, one felt piece at a time.

Cozy Neutral Chenille Wreath - LeroyLime


I rolled each flower and then hot glued the back to seal them shut, aren't they cute?!
A small scrap of green felt was turned into tiny leaves, these I simply cut by hand.

Cozy Neutral Chenille Wreath - LeroyLime

After attaching my ribbon to the larger wreath, I hot glued the smaller wreath on top of the larger and then started gluing on the flowers. I added leaves here and there and then hung the wreath on our old curbside free window I picked up in Newport, Rhode Island. Simple, cozy and neutral. 

Cozy Neutral Chenille Wreath - LeroyLime

11.16.2015

DIY Paper Bag Banner

How to make a Paper Bag Banner - LeroyLime


Yes, you read that correctly...the pennants on this banner were made from a single brown paper bag!
If you buy groceries, you're bound to have a paper bag lying around somewhere.

Supplies needed:
1 Brown Paper Bag
Marker or pen
Scissors
Ruler
Hole Punch or Crop-O-Dile
Hot Glue Gun/Glue Stick
Chipboard or Sticker Letters
Bakers Twine, String or Yarn

How to make a paper bag banner

First I cut along one of the edges and around the bottom of the bag to remove the bottom piece. I used the bottom to create my template since it's normally thicker than the sides of the bag itself. Snip off the handles, if you'd like, so they don't get in your way.

Grab your ruler and draw an outline of a pennant. Cut this out and use this as your template so all of your banner pieces are the same size.

How to make a paper bag banner

Open up your bag on a flat surface and trace your template pennant with your marker. I chose the word Harvest since Thanksgiving is the next holiday and traced two extra pennants to use at each end.

I crumpled up each triangle piece to give it more texture and to hide the bag lines. This step can be skipped if you don't like the worn look.

How to make a paper bag banner

Stack your pennants on top of each other and either use a Crop A Dile to punch through the entire stack at once or you can use a simple hole punch and punch each piece one by one, in the top two corners.

I had some chipboard letters lying around from a clearance sale at Target, so I picked out the letters needed to spell my word and plugging in my hot glue gun.

To add a little more color to my banner, I strung it with orange/white bakers twine. 
Tip: wrap a small piece of washi tape on the end for easier threading

How to make a paper bag banner

Some pretty fall leaves, which we've been collecting on our bike rides add a fun fall touch to the ends. A squirt of hot glue for the leaves and letters...banner complete!

How to make a paper bag banner w/LeroyLime

The perfect addition to your mantel or hutch for Thanksgiving dinner.

DIY Paper Bag Banner - LeroyLime


11.10.2015

$1 Green Wreath


$1 Wreath - using yard waste - LeroyLime


After trimming up our outdoor landscaping for the winter, 
I decided to let a few of my trimmings take center stage for just a bit longer.

$1 Wreath - using yard waste - LeroyLime

I picked up the wire wreath shape from my local dollar store for just one dollar and grabbed a roll of fishing line (that I had on hand) to attach the pieces to my wreath form.

Tie the pieces on one by one and then fill in the spots by slipping in a few smaller pieces until you
get "the look" you are trying to achieve. My goal was to just cover up any and all portions of the wire wreath form.

$1 Wreath - using yard waste - LeroyLime

 Hang and enjoy! This one lasted about a two weeks before the leaves turned brown. It took less than 10 minutes to pull it together so if you're looking for a quick project to wow your company, keep a  wire wreath form on hand. You can fill it with anything for a fun simple creative project!

$1 Wreath - using yard waste - LeroyLime


11.04.2015

Mustache Party Ideas

Mustaches are cool hip and trendy...perfect for all ages and such a fun party theme to throw together quickly! You can find mustache items pretty easily now, in the dollar sections at store, in the sticker aisle at craft stores and even in the punch aisle. I wrapped a piece of artwork with a black vinyl table cloth and then ran some green crepe paper around it to look like a package. Some quick mustaches cut out by hand on green paper added to the backdrop.

Mustache Party Ideas

A mustache punch is how I made these cute mini mustache cupcake toppers. A little bit of cardstock, glue, wooden sticks and they doubled as a mustache photo prop! Just hold in place and say cheese...

Mustache Cupcake Toppers

I asked my son what color he'd like me to work with and he chose green, his favorite for the moment. Found this fab black and white wrapping paper in the dollar section at Target and picked up a roll of green crepe paper for decorating. Black and white chevron paper plates and cups were found at Wally World and a package of green napkins helped keep our green vibes flowing throughout.

Mustache Party Ideas Favor Bags

I am not a fan of all the plastic kitschy toys that are usually passed out in goody bags. They usually break within the first hour and when my kids bring home whistles, um, no thank you! But really, what's a party without goody bags? A bit of sweet with the green apple Pop Rocks, a glow stick necklace, a fuzzy mustache (for wearing) and mustache foam stickers. Simple, not too over the top and I think they did the trick. It's always nice to give a little thank you for those that took the time to come to a party and I haven't had a kiddo turn down a goody bag...yet.

Mustache Party Ideas Favor Bags


10.21.2015

Elmo Rainbow Party (on the cheap)

I'm not a huge character fan *insert gasp here...but you can't help but fall in love with Elmo
and that's exactly what every one of my four kiddos has done!


I was standing in the party aisle at Wally World trying to come up with something crafty and found these fun chevron rainbow colored plates, perfect for a rainbow themed little girl's Birthday and of course with the color red, I was able to fit Elmo into the theme!


 I snatched up the last of the mini paper rosettes at .70 cents per pack of two, a total steal in my book and promptly went home to punch out elmo features to make his face. I used two different sized circle punches for his eyes, an oval for the nose and a large circle that I cut with my Big Shot and xl Sizzix circle die and then trimmed in half for the mouth. Because the rosettes have gaps, hot glue was the best way to adhere the pieces onto the rosettes.

Elmo Rainbow Party Ideas (on the cheap)


 Streamers are a fun way to add color inexpensively to any space, so I hung mine in a rainbow pattern, first covering a piece of artwork with a red vinyl table cloth so it didn't show through.

Elmo Rainbow Party Ideas (on the cheap)

 I can't take credit for the cupcakes...they were already frosted in primary colors and the elmo cupcake toppers were also found at Wally World in the party aisle. 

Elmo Rainbow Party Ideas (on the cheap)

Elmo Rainbow Party Ideas (on the cheap)

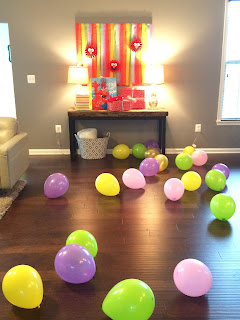
Here are a few more shots of decorations, our 2 year old was a very happy camper and LOVED all the Elmo's. The Happy Birthday Rainbow banner is one I now have listed in my LeroyLime Etsy shop, you can view that HERE. The two rainbow colored paper balls were also in the party aisle at Wally World. Wally World for the win!! And a party wouldn't be complete without gobs of balloons!

Elmo Rainbow Party Ideas (on the cheap)

Elmo Rainbow Party Ideas (on the cheap)

Elmo Rainbow Party Ideas (on the cheap)

Elmo Rainbow Party Ideas (on the cheap)